-
-
-
Screws and nuts are strongly sour, so before removing the need to handle hardware "liquid wrench".
Front bumper
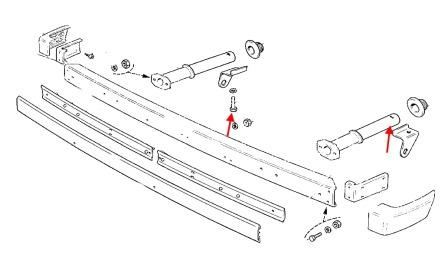
The bumper is held on two bolts.
-Unscrew one bolt each side (spun upwards) holding the bumper brackets to the body.
-take out the bumper rubber seals to itself (important to pull evenly to avoid distortion).

Lada 4x4 Urban
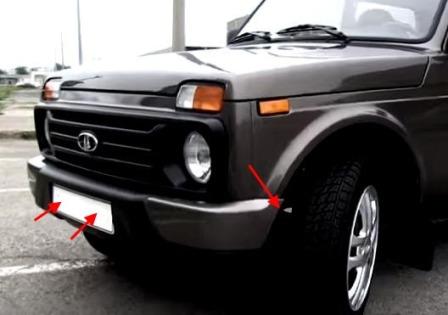
Front bumper Lada 4x4 Urban is attached to the conventional bumper Fields and to the wings.
-Unscrew the two screws under the license plate.
-depending on which side we will disassemble, wrenched the wheel.
-Unscrew the screws in the wheel wells that hold the fender liner (if any).
-for wheel arch liners Unscrew the nuts that attach the angles to the wings.
-pulls the bumper forward (don't want to break the wires).
-remove the fog lamp connectors (if any).

Rear bumper
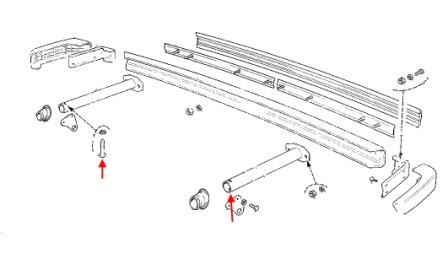
-Unscrew one screw on each side (spun upwards) holding the brackets to the body.
-pull the bumper backwards (look, to avoid bias).

Lada 4x4 Urban
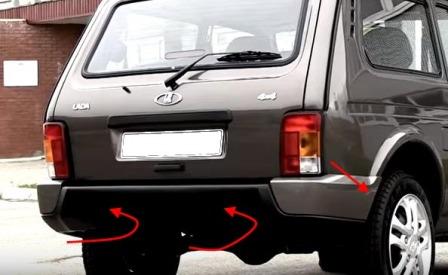
As well as the front, the rear bumper of Lada 4x4 Urban is attached to the factory Fields.
-wheel arches Unscrew the screws that attach the fender liner.
-for wheel arch liners Unscrew one nut on each side that attach the angles to the wings.
-from the bottom, between bumper and body, Unscrew the two screws.
-with the assistant gently pulls the back bumper (don't want to break the wires).
-remove the connectors from the equipment (if any).


 English
  Italiano
  Français
  русский
  Deutsch
  Español