-
-
-
Depending on the year of release of attachment is different.
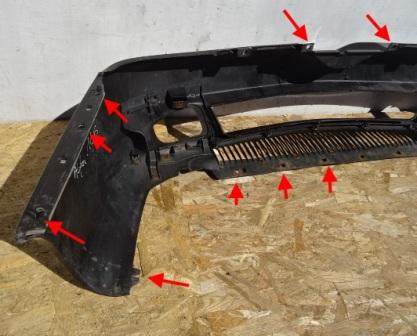
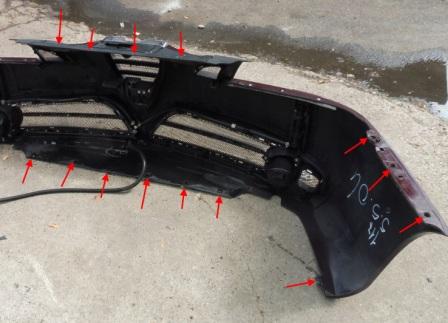
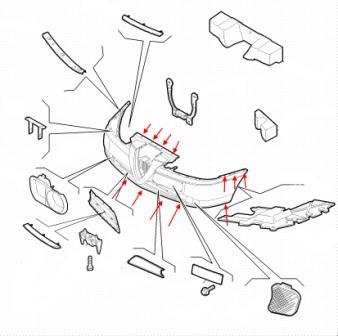
Front bumper
-open the hood.
-(before the restyling) under the hood, Unscrew the screws and remove the grille. Under the grille, Unscrew the four screws.
-(after restyling) Unscrew the four screws that secure the top.
-Unscrew the screws around the perimeter of the bottom (spun up).
-wrenched the wheel to the side.
-wheel arches vacated lockers (not necessarily to shoot).
-for wheel arch liners Unscrew three screws on each side (spun upwards) holding the corners of the bumper to the wings.
-with the assistant pulls the bumper forward (don't want to break the wires and hoses).
-snap together the connectors of the fog lights.
-switched the hoses to the headlight washers (if any).
Rear bumper
-open the trunk lid.
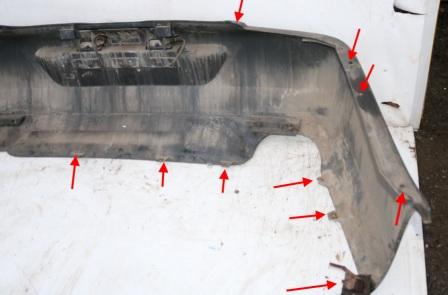
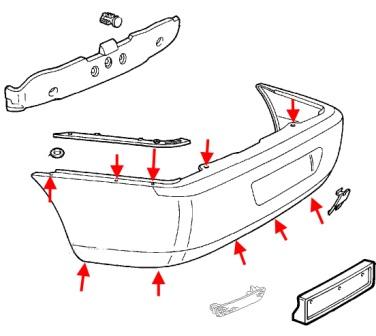
-in the opening of the trunk, Unscrew the two screws.
-in the trunk, we release the side trim (you need to access the inner part of the wings).
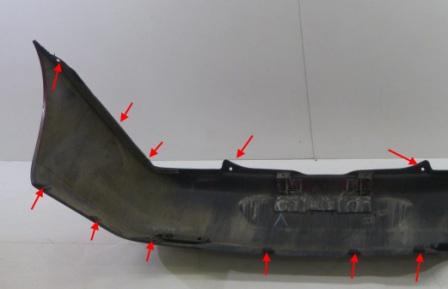
-for casings, Unscrew the screws that attach the bumper to the wings.
-Unscrew the perimeter of the bottom of the screws (spun up).
-wheel arches, peel the fender liner.
-the fender liner, Unscrew the screws (spun upwards) holding the corners to the wings.
-with the assistant pulls the back bumper (don't want to break the wires).
-breakaway connectors from the light plate and parking sensors (if any).


 English
  Italiano
  Français
  русский
  Deutsch
  Español