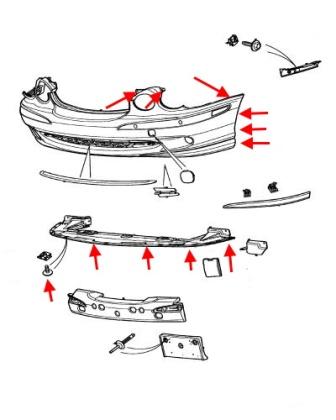
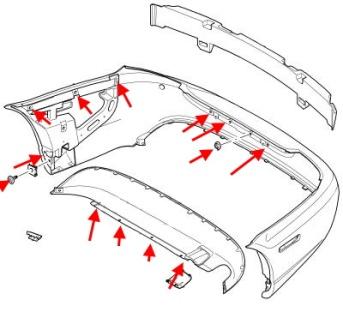
Depending on the model year and body type of attachment may vary.
Front bumper
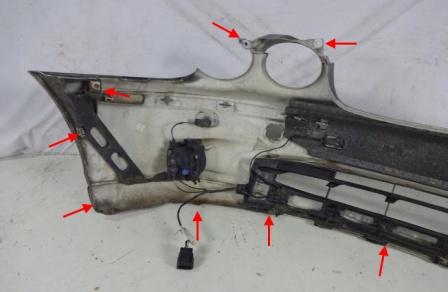
-open the hood.
-under the hood, Unscrew the four screws above the headlight that attach the top.
-around the bottom part Unscrew the six screws (spun up) that secure the protection.
-take out the repeaters of turn indicators in the bumper and remove from their connectors.
-wrenched the wheel to the side.
-wheel arches Unscrew three screws on each side and removed the wheel arches (the front part).
-for wheel arch liners Unscrew one screw on each side holding the corners of the bumper to the wings (twisted from the motor side).
-behind the left headlight connector vacated Parking sensors and fog lights (if any).
-if you have headlamp washers, remove the nozzle and remove the cap.
-with the assistant pulls the bumper forward (look for wires).

Rear bumper
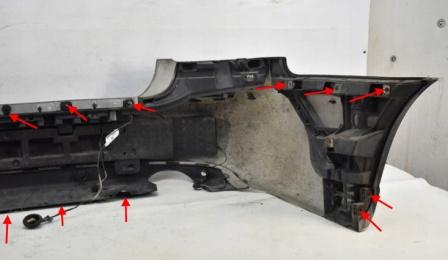
-open the trunk lid.
-in the trunk, Unscrew the screws, and remove the back and side plating.
-behind the rear casing, through holes (need knob), Unscrew the four nuts.
-the side casings, in the inner part of the wings, Unscrew two screws on each side (remove, if necessary, additional equipment).
-Unscrew the four screws in the bottom (spun up).
-in the wheel wells, Unscrew the screws and peel the fender liner (rear part).
-for wheel arch liners Unscrew one screw on each side that attach the angles to the wings.
-with the assistant pulls the bumper backwards (look for wires).
-snap together the connectors of the equipment (if any).


How to remove front and rear bumper Jaguar F-Type
How to remove front and rear bumper Jaguar S-Type

 English
  Italiano
  Français
  русский
  Deutsch
  Español