-
-
-
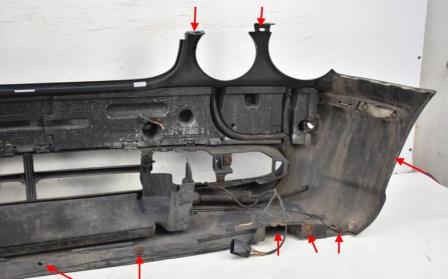
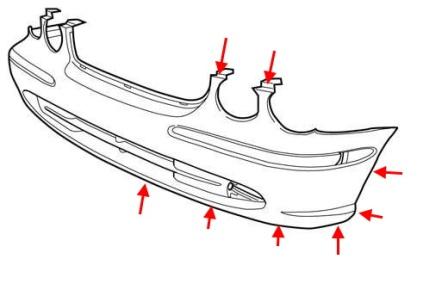
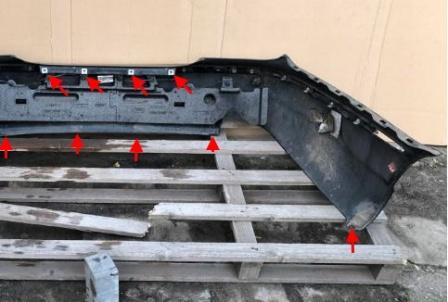
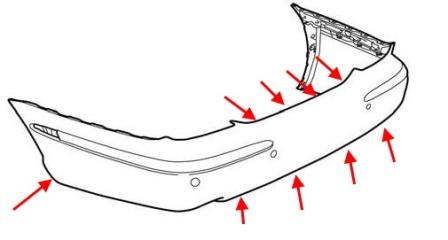
Depending on the year the site of attachment may vary slightly.
Front bumper
-open the hood.
-under the hood the four screws (spun down) that secure the upper part and the grille, release the latch.
-we release the two clips, between the radiator and the grille and remove the grille.
-around the bottom part Unscrew the screws (spun up) that secure the protection.
-wrenched the wheel to the side.
-in the wheel wells, Unscrew the screws and peel the fender liner (front part).
-we release the latch in the wings (pull the corners in and forward, you need to make the effort).
-with the assistant pulls the bumper forward (look for wires and hoses).
-snap together the connectors of electrical equipment.
-if you have headlight washers, disconnected the hoses.


Rear bumper
-open the trunk lid.
-take out the caps and remove the rear trim panel.
-the casing Unscrew the four screws.
-Unscrew the four screws in the bottom (spun up).
-in the wheel wells, Unscrew the screws holding the fender liner (rear part).
-we release the latch in the wings (pull the corners into themselves and back, you need to make an effort).
-with the assistant pulls the bumper backwards (look for wires).
-snap together the connectors of the sensors (if any).


 English
  Italiano
  Français
  русский
  Deutsch
  Español